
ปรับแต่งรูปแบบการพิมพ์
Print Formats คือเลย์เอาต์ที่ถูกสร้างขึ้นเมื่อคุณต้องการพิมพ์หรือส่งอีเมลธุรกรรม
ฟีเจอร์นี้มีประโยชน์สำหรับธุรกรรมทั้งหมดใน ERPNext เช่น ธุรกรรมการขายและการซื้อทั้งหมด เอกสาร HR และอื่นๆ อีกมากมาย
ใน ERPNext มีสามประเภทของ Print Format ได้แก่ Standard Print Format, Custom Print Format และ HTML Print Format
Standard Print Format (รูปแบบการพิมพ์มาตรฐาน)
ทุก Printable Document Type ใน ERPNext จะมี Standard Print Format ของตัวเองซึ่งถูกสร้างโดย Frappe Framework การวางฟิลด์ใน Standard Print Formats จะขึ้นอยู่กับตำแหน่งของฟิลด์ที่เกี่ยวข้องในเอกสาร
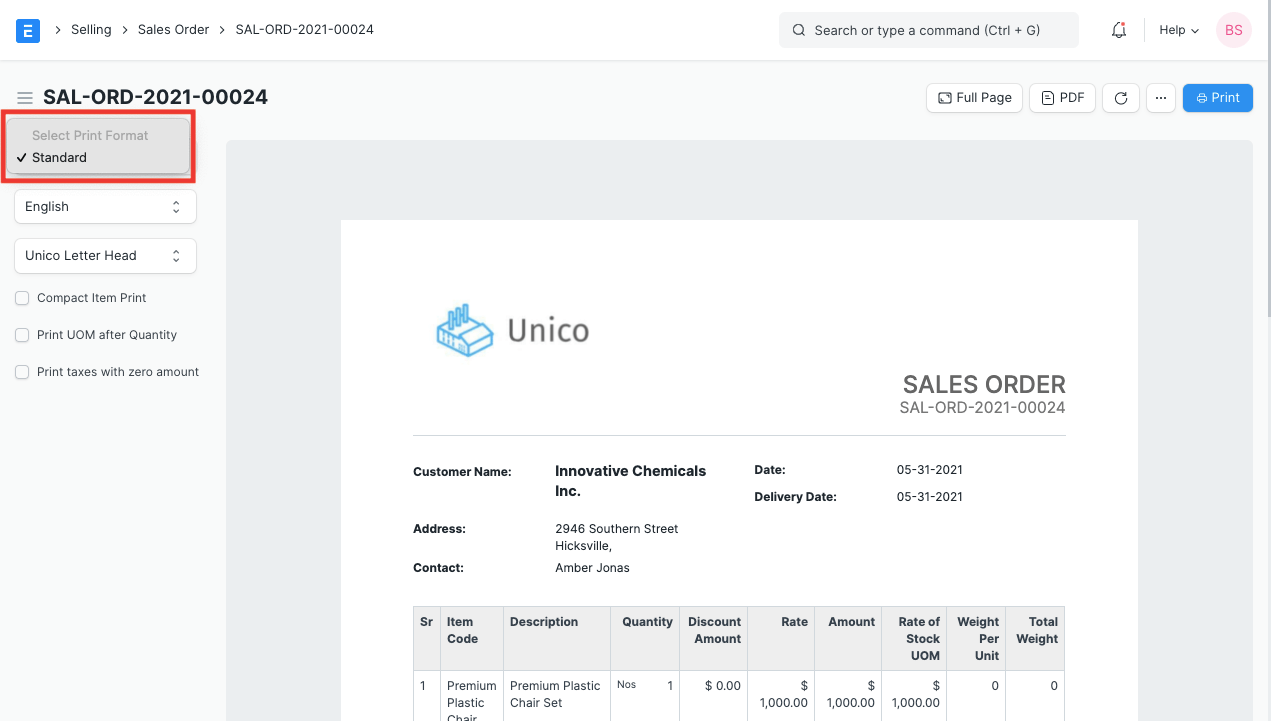
การเปลี่ยนแปลงใดๆ ที่ทำกับ Standard Print Format จะต้องทำโดยใช้ Customize Form คุณยังสามารถดู adding fields in Print Formats
Custom Print Format (รูปแบบการพิมพ์ที่กำหนดเอง)
คุณยังสามารถสร้าง Print Format ที่กำหนดเองของคุณโดยใช้เครื่องมือที่เรียกว่า Print Format Builder เครื่องมือนี้จะช่วยคุณในการสร้าง Customized Print Format แบบง่ายโดยลากและวางฟิลด์ในรูปแบบตามที่คุณต้องการ
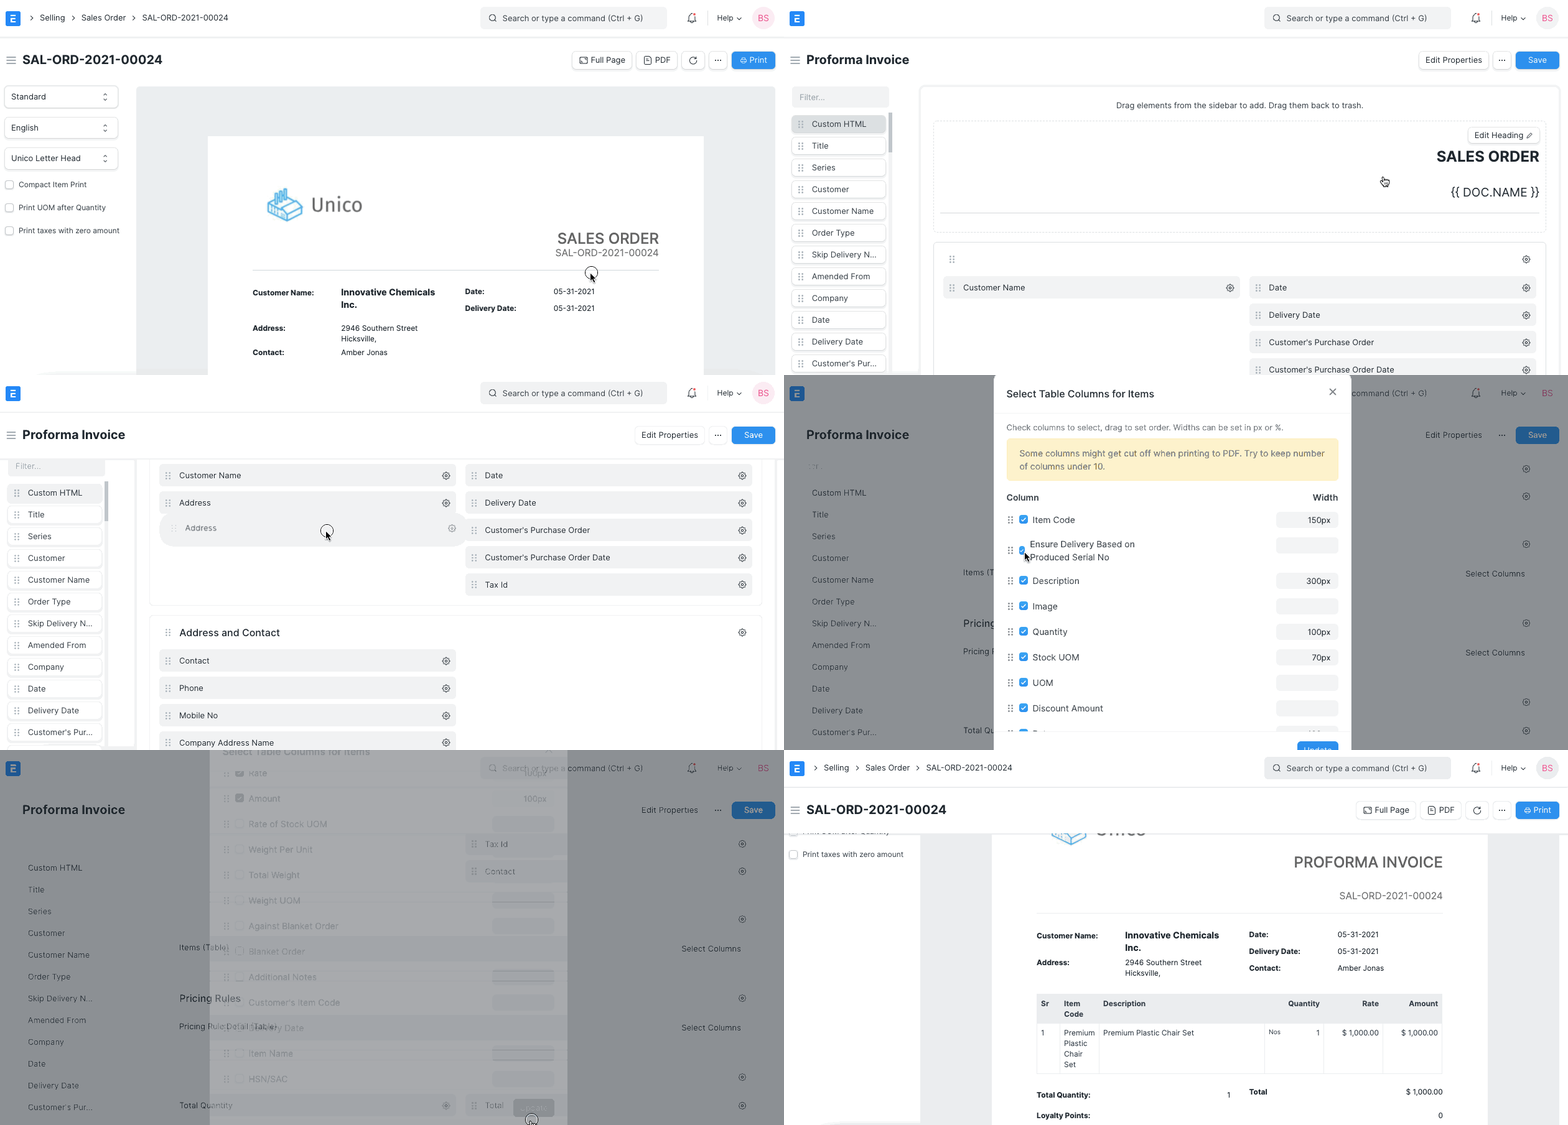
สำหรับการสร้าง Custom Print Formats ERPNext มาพร้อมกับเทมเพลตที่กำหนดไว้ล่วงหน้าหลายแบบในสามสไตล์ ได้แก่ Modern, Monochrome และ Classic
หากต้องการสร้างเวอร์ชันของคุณ ให้เปิดเทมเพลตที่มีอยู่จาก:
สร้าง > มุมมอง > รูปแบบการพิมพ์
Print Settings (การตั้งค่าการพิมพ์)
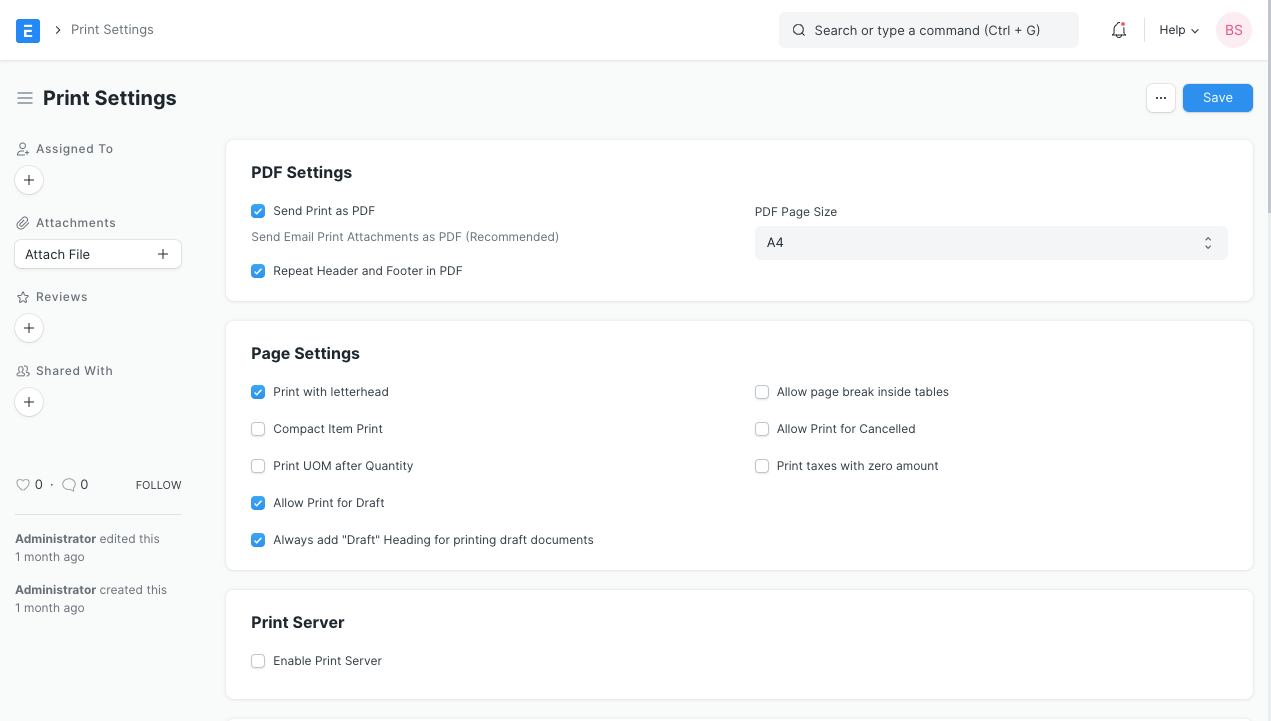
หากต้องการแก้ไข/อัปเดตการตั้งค่าการพิมพ์และ PDF ของคุณ ให้ไปที่:
การตั้งค่า > การตั้งค่าการพิมพ์
HTML Print Format (รูปแบบการพิมพ์ HTML)
สำหรับการสร้าง HTML Print Format คุณจะต้องมีความรู้เกี่ยวกับ HTML, CSS และ Python บางส่วน นี่คือตัวอย่างของวิธีการออกแบบ Print Format ที่มีรูปแบบเฉพาะมาก
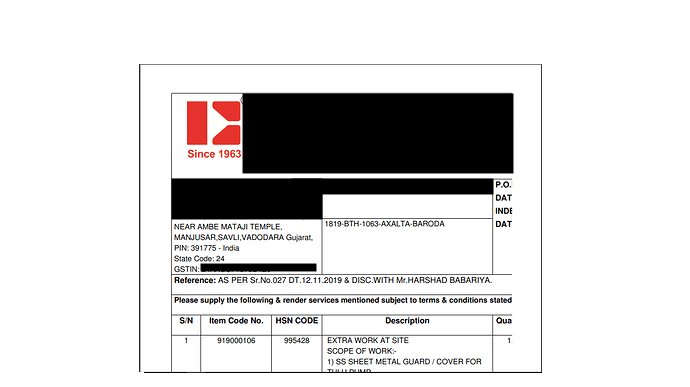
Print Formats ถูกจัดหาในฝั่งเซิร์ฟเวอร์โดยใช้ Jinja Templating Language ฟอร์มทั้งหมดสามารถเข้าถึง doc object ซึ่งมีข้อมูลเกี่ยวกับเอกสารที่กำลังถูกจัดรูปแบบ คุณยังสามารถเข้าถึงยูทิลิตี้ทั่วไปผ่าน frappe module หากต้องการรับการสนับสนุนเมื่อสร้าง print format แบบ HTML คุณสามารถอ้างถึง ERPNext Community forum หรือเริ่มโพสต์ใหม่สำหรับคำถามของคุณ
สำหรับการจัดรูปแบบ Bootstrap CSS Framework ถูกจัดหาให้และคุณสามารถใช้คลาสทั้งหมดได้
อ้างอิง
ตัวอย่าง
<h3>{{ doc.select_print_heading or "Invoice" }}</h3>
<div class="row">
    <div class="col-md-3 text-right">Customer Name</div>
    <div class="col-md-9">{{ doc.customer_name }}</div>
</div>
<div class="row">
    <div class="col-md-3 text-right">Date</div>
    <div class="col-md-9">{{ doc.get_formatted("invoice_date") }}</div>
</div>

        {%- for row in doc.items -%}

        {%- endfor -%}
    <table class="table table-bordered">
    <tbody>
        <tr>
            <th>Sr</th>
            <th>Item Name</th>
            <th>Description</th>
            <th class="text-right">Qty</th>
            <th class="text-right">Rate</th>
            <th class="text-right">Amount</th>
        </tr><tr>
            <td style="width: 3%;">{{ row.idx }}</td>
            <td style="width: 20%;">
                {{ row.item_name }}
                {% if row.item_code != row.item_name -%}
                <br>Item Code: {{ row.item_code}}
                {%- endif %}
            </td>
            <td style="width: 37%;">
                <div style="border: 0px;">{{ row.description }}</div>
            </td>
            <td style="width: 10%; text-align: right;">
                {{ row.qty }} {{ row.uom or row.stock_uom }}
            </td>
            <td style="width: 15%; text-align: right;">
                {{ row.get_formatted("rate", doc) }}
            </td>
            <td style="width: 15%; text-align: right;">
                {{ row.get_formatted("amount", doc) }}
            </td>
        </tr></tbody>
</table>
หมายเหตุ
- หากต้องการรับค่าวันที่และสกุลเงินที่จัดรูปแบบแล้ว ให้ใช้
doc.get_formatted("fieldname") - สำหรับสตริงที่แปลได้ ให้ใช้
{{ _("This string is translated") }}